Owning a Lasko blower fan is an excellent way to ensure efficient cooling and optimal air circulation in your living or work spaces. Regular cleaning is key to maintaining its effectiveness and extending its lifespan. This comprehensive guide will walk you through the process, ensuring your fan stays in peak condition.
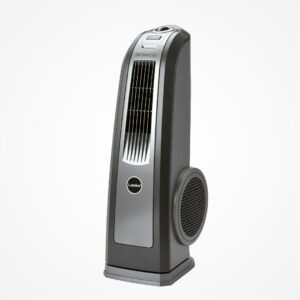
Whether you own a Lasko Tower Fan, Lasko Box Fan, Lasko Window Fan, or an Oscillating model, your cooling companion is integral to maintaining comfort in your home or office. However, regardless of the type, all fans are vulnerable to accumulating dirt and debris. This build-up occurs not only on the outer casing but also on the blades, which can significantly affect the fan’s efficiency and performance.
Safety First:
Before cleaning, prioritize safety. Disconnect your fan from its power source to avoid electrical accidents. Handle all components carefully, especially the sharp blades, and work in a well-ventilated area to minimize dust inhalation.
Step 1: Disconnecting Your Fan
The first step in cleaning your Lasko blower fan is to unplug it from the electrical outlet. This simple action ensures your safety and prevents any damage to the fan during cleaning.
Step 2: Disassembling the Fan for Cleaning
Depending on your fan model, begin by removing the front grille, which is often secured with clips, screws, or latches. Next, detach the blades and, if necessary, disassemble the fan housing to access internal components.
Step 3: Cleaning the Exterior Surfaces
With the fan disassembled, start cleaning the exterior surfaces. Use a soft brush or toothbrush to dislodge dirt and dust, especially from hard-to-reach areas. Wipe down the exterior with a microfiber cloth dampened with a mild cleaning solution, being careful around controls and buttons.
Step 4: Thoroughly Cleaning the Blades
Fan blades are prone to accumulating dust, which can hinder performance. Clean them with a soft brush, and for more stubborn dirt, use a mild detergent. Ensure they are completely dry before reassembling.
Step 5: Addressing the Fan Housing
The fan housing also requires attention. Brush away dust and, if needed, use a mild cleaning solution. Rinse carefully to avoid water damage to electrical components.
Step 6: Refreshing the Grille
The grille, sometimes non-removable, should be cleaned to maintain airflow efficiency. Brush and, if necessary, wash it gently, making sure not to expose electrical parts to water.
Step 7: Reassembling Your Fan
Carefully reassemble your fan. Ensure all parts are correctly aligned and securely attached, following any specific instructions from the manufacturer.
Step 8: Final Steps – Testing Your Fan
Once reassembled, plug in your fan and test it. Listen for unusual noises and observe the airflow to confirm everything is in working order.
Additional Cleaning Tips
- Regularly clean the fan filter, if present, to ensure optimal airflow.
- In cases of heavy dirt, compressed air can be effective.
- Cleaning frequency depends on usage and environment; at the start of each new season is a good rule of thumb.
By following these steps and tips, your Lasko blower fan will continue to operate efficiently, providing comfortable air circulation in your space. Regular maintenance not only improves performance but also extends the lifespan of your appliance.